Plique-a-Jour

Lalique
Plique-a-jour is usually considered to be one of the most difficult techniques of enamelling. I took a class with Fay Rooke a few years ago, and spent about 60 hours making my piece. It was a delight – but the time investment was prohibitive. Especially since, at the time, I was mostly selling my own work at shows. The pieces would have to be very expensive. This would make them difficult to market. Though I was captivated by the process, I had to put it on hold for a number of years.
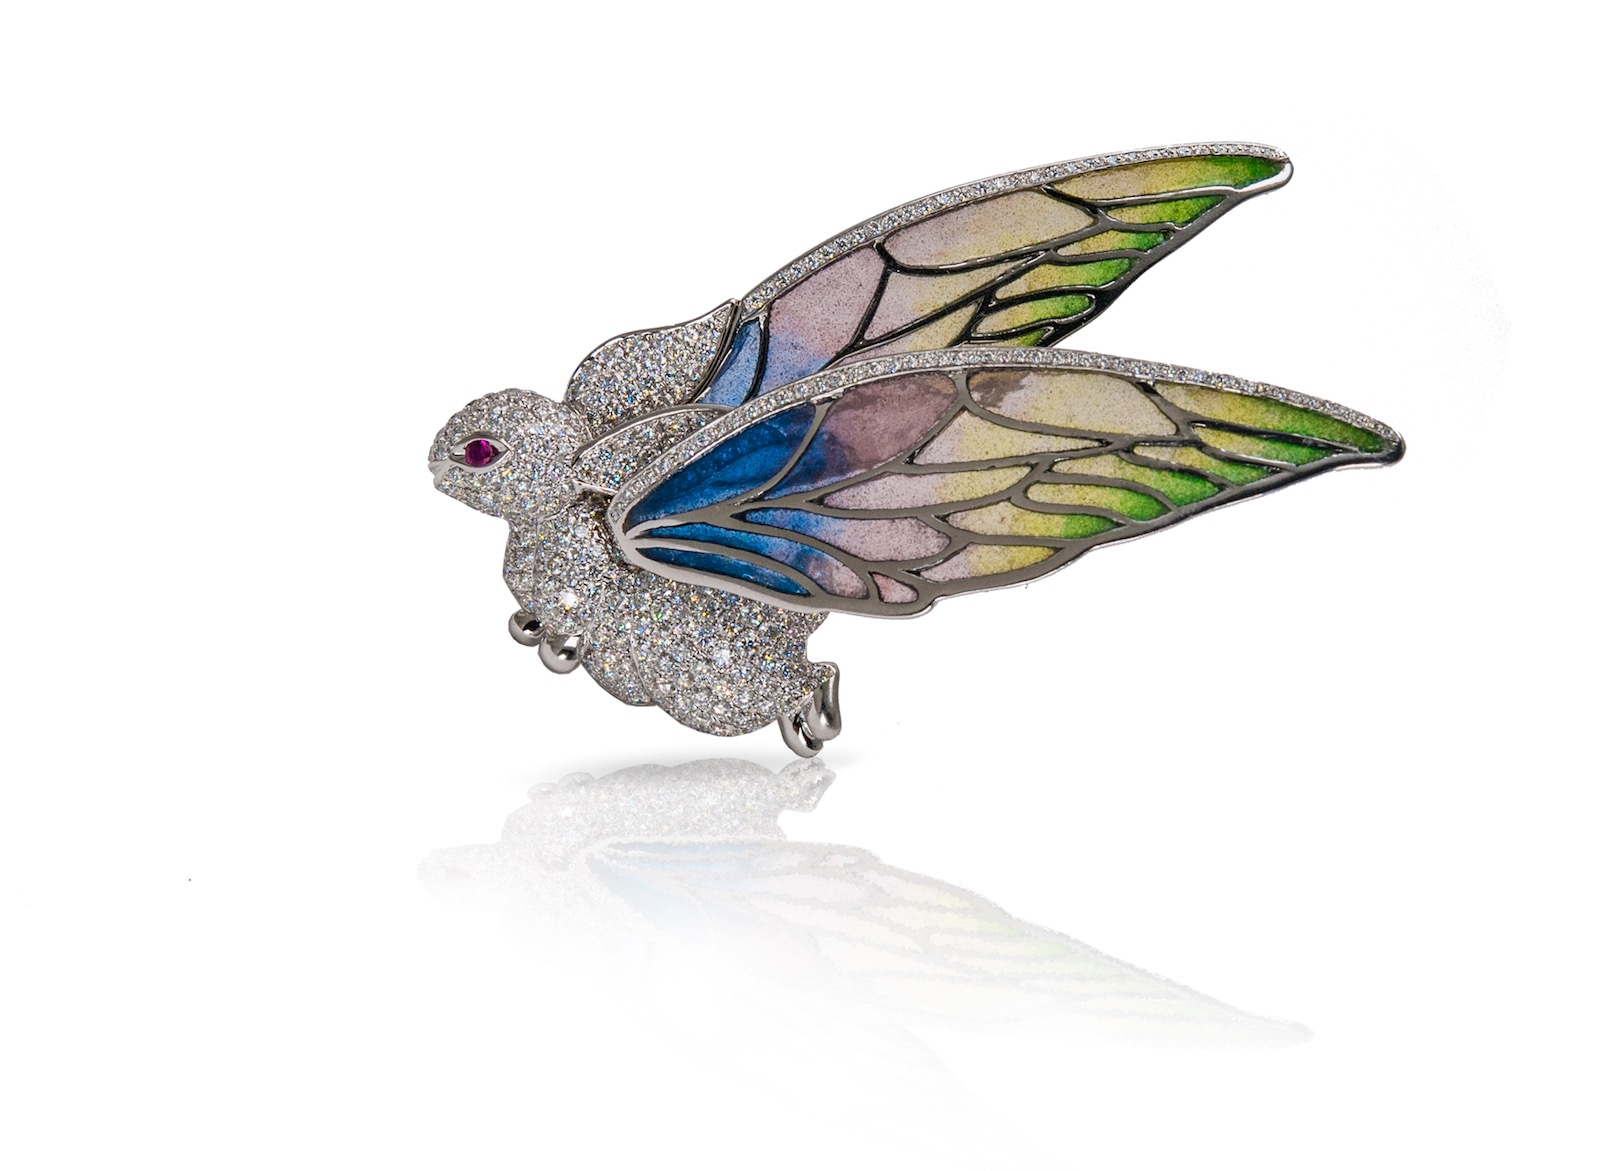
My break came when I was approached by the friend who had initiated the Minakari Project (which has been dormant but not forgotten!) Amir Sheikhvand worked for Mindham Fine Jewellery, and they wanted to make something spectacular in the style of Lalique. Something with plique-a-jour wings with subtle shading and plenty of diamonds!

Initial drawing
Happily, they understood that every enamel project is a new adventure, so I was allowed to make several tests before starting on the actual wings. We started with a simple small wing. In this project the jeweller did all the metalwork – all I had to do was enamel. I was nervous, but apparently after 35 years experience I had gotten good control over my firings! Imagine! This is the key to making plique-a-jour work in the method I had chosen. It is called the “surface tension” method, because you do not use anything as a back, you just use the surface tension of water to suspend the grains of enamel in the metal framework. Then comes the tricky part – firing until the grains just barely join together. Literally 1/2 second too long in the kiln can result in having to start again. And you have to fire about 10 layers like that … but I thoroughly enjoyed the process and was delighted with each new firing to watch the colours develop, ans see the sparkle of the tiny glassy grains. I build the layer of enamel up higher than the metal, and then ground back to a smooth finish. A final fire, just to bring up the gloss finished the piece.

First firing About half way through 10 firings Final fire
I thought it might be beginners luck – that happens to me a lot! The first piece of a new technique turns out great and then every one after has flaws and problems until I get an actual grip on all of the factors. But turns out I actually knew what I was doing! Because the second test turned out too! I had asked the jeweller to change the shape of the some of the cells, as I felt they would cause unnecessary tensions which create cracks. Also the new design had larger holes. One was too big to use surface tension. So I tried a method developed by Bill Helwig which involved using a backing of copper foil, which could then be peeled off. I found this method cumbersome and unsatisfactory. First of all it was not very enjoyable, as it involved a lot of tedious grinding, and it didn’t have the lightness of the surface tension method.
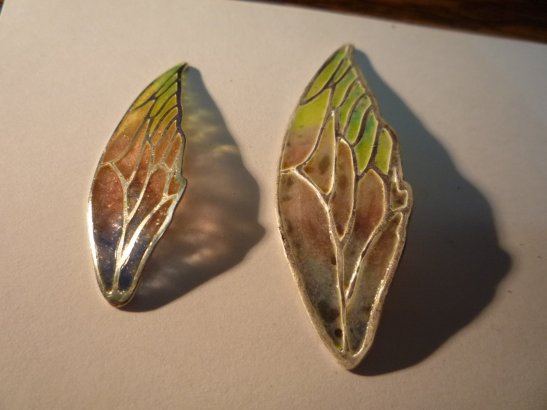
You can see the difference in clarity (the one on the left is the surface tension method)
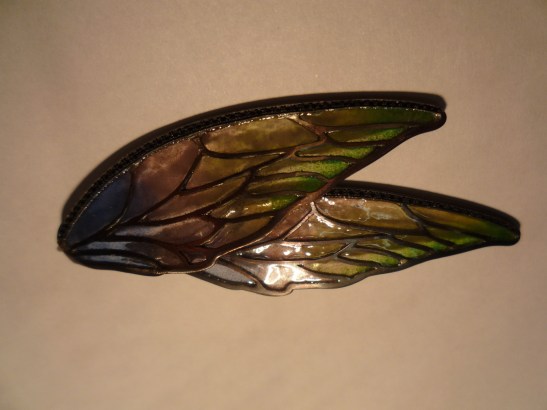
So the next incarnation had the large hole broken down into two. They were still quite large spaces – but I was able to manage them. I also had him change the design a bit to minimize the possibility of stress cracks. But as you can see – there were a few tiny stress cracks. These are caused by shifting stresses as the piece cools and the metal shrinks back to its original size (it expands when heated)

Up to this point – we were still working on sterling silver. The jeweller wanted white gold – but this was a very unfamiliar metal to me. Not only that, but many composite alloys are very difficult to enamel. They give off gasses which inhibit fusion. The only one I had had success with was something called enamelling gold (or green gold) which was an alloy of gold and silver only. In the end, we decided to try white gold that was bleached with palladium, as palladium does not expand and contract when heated as much as other metals. I read several positive reviews of enamelling results with it.

This is fired smooth on the front, but still sugary on the back – which gives it the sparkle
They were all true! It enamelled beautifully. It was a bit weird, as it turned blacker with each firing, but the scale was not loose, so I simply ignored it. I couldn’t pickle it anyway, as the scale needed sulfuric acid to clear (which I didn’t have) The jeweller dealt with that part of the problem. I felt we were good to go ahead with the actual wings. The jeweller decided to drill the stone settings before I started enamelling, so there wouldn’t be anything harsh to do that might cause a crack. all that would need to be done was to drop the diamonds into the holes and pinch the prongs. Here is the finished result of my part of the process. I can hardly wait to see the finished piece!
And here is the finished piece!