
Minakari
This is the culmination of a year of research and development undertaken in partnership with a local jeweller, Amir Sheikhvand. Amir apprenticed to a Minakari master when he was young, but had moved to Toronto and lost his connection with the art. Our mutual interest led to some very interesting research which we hope to publish soon. Minakari is a traditional form of Persian enameling centred in Isfahan.
Meanwhile I have been experimenting on my own. Minakari is basically an industrial process, with styles and practices that are suited to mass production (by hand). First the shape is cut, and the white base coat applied – then the fun starts!
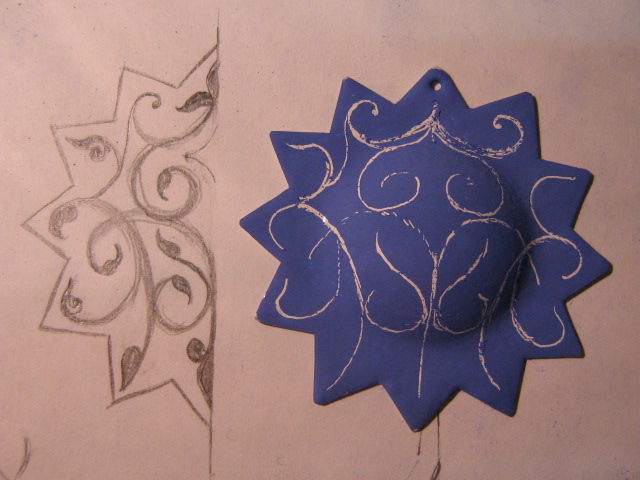 A layer of blue china paint (mixed with either a glycerine or an oil medium – I use oil) is applied and then left to get completely dry. Blue and/or turquoise are the traditional colours. The design (which I have laid out on paper) is applied by scratching away the china paint. I start tentatively, giving myself a margin for correction. I scratch with a wooden pointer.
 Once I have the basic layout I start widening the tendrils, and evening up the two sides so they are completely symmetrical. This is a small design, easily adjusted, but the traditional Minakari artist, if working on a large piece, might make a stencil that is outlined with tiny holes. He would then dust a white or black chalk over the holes to layout the design without disturbing the blue layers.
 Once the basic vines are laid down, I apply my second colour to the white spaces. I use the traditional turquoise which creates a pleasing but subtle counter-point to the royal blue background. I have made numerous tests so that I know how the col9ours will develop. When they are fired they won’t look at all like they do now!

The final step is to outline the entire design with a fine scratch line, and to embellish with dots. This is the most exacting part of the process, as the outline must be even and smooth. For this scratch I use a very sharp very hard wood to give me a finer line. I add accent colours (like the red) at this point also
Only one firing is required to fix all of the colours, but it must be very precise. Five seconds too long and all the colours will run. Five seconds to soon, and they will not be shiny. I add an outline of liquid gold and fire one more time. The gold must be added last as it is fired at a lower temperature than the paint.


Pingback: Plique-a-Jour | imago corvi
Pingback: ETSY STORE | imago corvi